heh for once a soldier does his job rightOriginally Posted by SeeDRankLou


keep it going


heh for once a soldier does his job right
If I was like Cloud I don't think I would have taken that test.
Changed to stop Jessweeee♪ from going insane. Is that better?


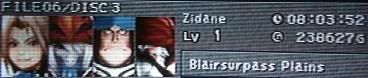
Ok, so I've been trying this for a while now. Very difficult to do in the first place let alone do fast. It's like Gizamaluke's Grotto 6 times in a row without a save. I got a save where I lost 5 minutes, unacceptable. I got one where I had unbelievable luck with Zidane's party, but then Beatrix got slapped around in the next battle, which figures. Then after many more tries and determination I got a save where a lost a little more than a minute, which I could live with. But I tried a few more times just to see what I could do. You know that excited high-pitched squeeling noise that's barely even noise when it comes out of your mouth? I was making that noise and fanning myself when I got this time, unbelievable....
Beatrix, Black Mages and Bandersnatches, Oh My!
Alright, this section is one of the most luck based sections so far, and probably of the whole game. You must rely on Stop 6 consecutive times, and then rely on the ATB being in your favor another 2 times. I'll break this down battle by battle.
Beatrix vs Zidane, et al
-This is the easy battle. Four on one, she can only target one character at a time. Unless she gets a full ATB and all your characters start with empty ones (which happened a few times) she will never have more than one character KOed at a time. Steiner is the important one that should stay alive, he does at least 3 times as much damage as anyone else can (unless Zidane gets a critical hit). No need to steal, so just "beat" Beatrix for the last time and be done.
Bandersnatch vs Beatrix and Freya
-For safety, Freya should attack, get knocked out and then Beatrix perform Climhazzard. Beatrix can take out a Bandersnatch in one hit at level 1, but not always. This time however, the Bandersnatch Rushed Freya and she got knocked out (a rare happening from the back row). So I had to hope Climhazzard would work by itself, and it did. Beatrix goes up to level 8.
-Now, I used a slightly different strategy than the guide said equipment-wise. I give Zidane the Dagger to put points toward Flee. I give Vivi the Bandana and Leather Wrist for the added Spirit, which seems to be more your friend than higher Magic, at least at level 1. Vivi wasn't evading enough to worry about evade. I also gave him the Silk Robe, which has Ability Up on it. I give Dagger the Stardust Rod, also with Ability Up, the Mage's Hat and the Mythril Vest. She will be learning Auto-Potion first instead of Vivi (it doesn't really matter, both will be knocked in one hit from this point on anyway). Ability Up is about to be a really big help.
Type C x3 vs Zidane, et al
*Prays to the heavens for some luck*
-Alright, in this one the non-Vivi's need to immobilize the Black Mages and then wait for Vivi to do his thing 3 times. Tents are the way to go here, unless a spell gets reflected back to one of them the poison will run out before it kills them. So I started with 2 tents and a Stop. One tent and Stop worked, that's one down and one helpless. I think Steiner got KOed here, and another tent didn't work, but the Stop that followed did work, that's two down and one helpless. Steiner came back and 3 Stops later the Black Mages are out, impressive work by Vivi. Vivi learns Blizzard.
-Zidane gets The Ogre.
Bandersnatch x2 vs. Zidane, et al
-The goal here is to Soul Blade each with Zidane and Stop each with Vivi. There are enough characters on screen to keep everyone alive, and Thundara will only hurt Steiner and Dagger. So one Soul Blade and one Stop, Stop didn't work. So vice versa, and the Stop did work. 2 Stops later the battle is over. Not as impressive as the Black Mage battle, but still impressive on Vivi's part.
-Zidane gets the Dagger again. Vivi and Steiner swap the Coral Ring and Power Belt.
Bandersnatch vs Zidane, Vivi and Dagger
-One on three, easy stuff. A tent worked, and then Stop worked. And thanks to Ability Up, Vivi learns Stop and Insomniac.
Bandersnatch x2 vs. Beatrix
-And everything can come crubling down with this battle, as it did oh so many times while trying to do this segment. This battle relies completely and entirely on Beatrix's ATB filling up first. Her Climhazzard at level 8 will kill both of them, she just has to get a chance to use it. She can survive one Rush, and about 3/5 the time Thundara won't kill her. But if she gets Tongued it's usually followed by a Thundara and it's all over. Her evade sometimes works with Rush, but don't put money on it. This time however, she started with almost full ATB and the battle was over. Beatrix goes up to level 11.
Bandersnatch x2 vs. Beatrix and Steiner
-Now this one is a little better. Beatrix can survive a lot more abuse, and Steiner is immune to 2/3 of the enemy's attacks. So, Steiner uses an Elixir on Beatrix, then Beatrix gets Tongued. So I have to wait a bit. Steiner gets harmlessly hit by Thundara, and Beatrix gets Rushed and wakes back up. Steiner knockes himself out and Beatrix wins. Beatrix goes up to level 13.
-After this random battles start to happen. Luckily there isn't much of a way to run and I didn't get one. Got a letter to deliver and I saved. I cannot believe this time. I actually got ahead by another minute. For future reference, more Spirit>more Magic.
I am so very very happy with this.
Escape
-While Bandit would be nice in this battle, Zidane only has 6 more points until learning Flee, so he keeps the Dagger. Vivi gets the Ice Staff, and he and Dagger trade the Mage's Hat and the Bandana.
-Ralvuimago is very easy. It curls up with a physical attack, and I think it resets its ATB or something. So Zidane steals, Vivi uses Blizzara and Garnet attacks. Then Vivi uses Focus.
-Interesting note, Ralvuimago will curl up even if the physical attack misses.
-Zidane steals two of the items before the battle ends. Zidane learns Flee, Vivi learns Loudmouth, and Garnet learns Reflect, Float, Auto-Potion, Protect and Scan. After some scenes and entering Pinnacle Rocks, I get 2 of the story pieces, deliver a letter and save.
Pinnacle Rocks
-This is a pretty simple area. The random battle rate isn't that high if you don't doddle around.
-3 chests to get, which are all very close to the remaining 3 story pieces.
-After getting the Peridot, instead of leaving, there is a letter from Stiltzkin to read. I take the lower path, the upper path is just asking for a random battle. After a few tries I got through without a random battle.
-When I get to Lindblum, I deliver a letter, get a letter from Ruby, get another letter to deliver and save.
G-Force 199 Aftermath
-Pretty much the same as the first trip to Lindblum, without the shopping. I get all the treasure, go through all the dialogue, get Lowell to go to Alexandria, deliver a letter and save half way to Qu's Marsh.
Lani's Elixir Gauntlet
-So I make my way to Qu's Marsh, get Quina back and find the excavation site. After all of the dialogue, I give Zidane the Mythril Dagger, unequip Auto-Reflect and equip Distract, Bandit and Insomniac.
-Running from Armodullahan is simple. First screen up, second screen down, third screen up.
-Lani on the otherhand can be a problem. Her main problem is that she's fast, she has a speed stat of 50 (max speed). So at least two character's ATB's need to be on the full-ish side at the start of the battle. Otherwise she'll KO Dagger and perform mass-Water, ending the battle.
-Lani will usually just attack Dagger (although sometimes she does use mass-Water despite Dagger still being alive, she never opens with that though). So I use Vivi to revive her and have Zidane steal, in an attempt to steal the Gladius. All the while, Quina uses Auto-Life, self-KO/revive and Limit Glove.
-Zidane ends up stealing an Ether and the Gladius right before getting KOed because Vivi was too slow with the Phoenix Down. But Quina saved the day.
-After this, I run all the way back to the first screen of Fossil Roo and get the Elixir and run all the way back. The goal is to only get 6 random battles. This is very difficult. I once got four random battles in one screen trying to get the elixir. However, luck is favorable eventually and I got 6 random encounter.
-Then I make my way through Fossil Roo. A few steps into the screen with Mogki I get another random battle. I decided to keep going though. I went west and got the Fairy Earrings and came back.
-I bought Stiltzkin's deal, read Mogki's letter from Kuppo and saved.
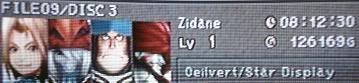
-In my seven random battle, Zidane quickly got the first turn and used Flee six of those seven times. I guess sometimes that's more important than the number of encounters (to a degree) because despite getting one more random battle than I wanted I actually got ahead by another 40 seconds.
And I'm glad I took the time to steal the Gladius, because look how much cooler it is than the Rune Tooth, both which have the Lucky Seven ability
Last edited by SeeDRankLou; 10-05-2007 at 07:40 PM.
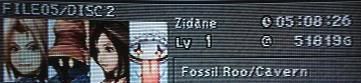
Fossil Roo
-Fun with Gargants, here at last. Now that the hard part of this is over, time for some treasure hunting.
-I go north, flip some switches and get an Ether, head back to Mogki and save.
-Then I go west, flip some more switches, get a Lamia's Tiara and a Survival Vest.
-I find Kuppo behind some rocks, get a letter to deliver for him and save.
-And now for some digging with a pick axe. There seems to be a random number of Ores and High Potions to get, so there's no way to say that any or all of those are missable because there's no way to know how many there are. But there's only one Madain's Ring, I would say that's a missable item. I don't know why this isn't considered a missable item by others who do this challenge. The entrace to Fossil Roo collapses in disc 3 (or else I would take that way to get the Elixir) and there is no food to call a gargant at the exit, so this is the only time to play this mini-game. Well, I'm getting it.
-So after doing this many times, I found this one spot on the upper part all the way on the left that gave me an item 99% of the time, and gave me the Madain's Ring several times, but I had been digging for like 5 minutes. But it's this very precise spot, in the middle of 3 black holes that kind of make a face, and it's sometimes hard to see if you are hitting it or not. So after many tries I just started going straight to that spot and just tried there, reset if I didn't get it.
-I had a save where I got it in about 2 minutes. After trying several attempts to do it faster, I get that down to 1 minute, which I'm happy with. Before I save again I sell my remedies, phoenix pinions and most of my ethers.
-And now, with all my spoils in hand, it's time to leave. Flip the last switch and ride the gargant to the exit. Did not suffer through any more random battles while in this section.
-While the name plate is on the screen, I traverse the Outer Continent all the way to the patch of grass right outside of the Qu's Marsh area. This took a few retries because of random battles.
"If ye dinnae say Rally-Ho, then ye cannae enter Conde Petie, hametoon o' the dwarves!"
-I go doon tae yon big birdie marks, alls while stayin' away from those pesky moonsters. I pull out some of me birdie food, and like mejick he comes runnin' right fast. He cairrys me tae the dwarf hametoon. He is mighty fast, sae he can run past those moonsters.
-I must suffer some speekin', but only a wee bit. After, there's two piles a' mooney, a fire bird's wing and a sparklin' clear stone tae be found.
-One a' those little furry lads has a letter for his friend, but the wee lad cannae get it sent. Someone has tae help the poor lad.
-I talk tae me wee pyntie-het friend. He sees one a' his kin and goos runnin', so I follow him.
-Me birdie cairrys us over tae yon forest, again runnin past the moonsters. I play me flute and a furry lad comes tae help me on me quest.
Black Mage Village
-First I must get to the village. That involves a small maze. What is frustrating about this area is that you don't really exit, so the encounter rate never changes. In short, I pretty much have to get a random battle. But I just get one, which was a chore.
-First a bit of treasure hunting. This area is open in disc 4, so no need to get everything. The Ether however is missable, so I get that. I also get a letter to deliver.
-I synthesize the remainder of the Cotton Robes that I couldn't sythenize earlier. Then there are quite a few scenes, and then I regain control.
-After this, I go back to the moogle and read his letter from Stiltzkin. Had I not picked up the delivery earlier, Artemicion would have picked it up while delivering this letter and I would be a letter short on my total.
-And now for some shopping. Got to take care of some missable items. 99 Steepled Hats, 3 Ritual Hats, 1 Magic Armlet, 1 Adaman Vest (stole another earlier) and 1 Magician Cloak for strategic use.-7 Bandanas. Bandanas sythesize into Silk Robes, of which I need 4 for the mages plus 1. I also need 6 Bandanas for the non-knights plus 1. That's a total of 12 Bandanas I need. But I found 1 Silk Robe in Cleyra's Trunk, and I get another one for catching frogs, so that's only 3 Silk Robes I need to make, which means I only need 10 Bandanas. So 7 here, 2 from earlier and 1 that I found makes 10.-I could get the Black Belt now (also missable), but there's a much faster way to do it in disc 3. I have no real use for it now anyway.
-1 Leather Plate. I need 2 for the thieves plus 1. I found 1 earlier, and I unequipped one from Marcus. This makes 3.
-2 Chain Plates. I need 2 for the thieves plus 1. I found 1 earlier, this makes 3.
-8 Mythril Vests. Mythril Vests synthesize into Brave Suits. I need 2 of those for the thieves plus 1. I also need 6 Mythril Vests for the non-knights plus 1. That's a total of 10. I already found 2 Mythril Vests earlier, this makes 10.
-Then I ride Choco back to Conde Petie.
"Rally-ho! Happy fit! Off tae the Sanctuary then, are ye?"
-And now, if Ah wantae pass this village, two of us must be joined. I know it sounds like a pain, but it goes by quick enough.
-But only time for one ceremony, sae me gourmand and pyntie het friends dinnae get joined. I go tae the furry lad by the stairs, and he jots soomthin' down.
-But there be one more job before we leave. A we lad Bryan Rootrunner rather likes those oglops. I dinnae kin the taste, but methinks if Ah find one Ah will bring it back for him.
-As we are sent off to "sanctuary", a we lass with a horn and a furry lad went runnin' by, thievin' some bread. We find her on the path, stuck on a branch. Me gourmand friend is curious about the taste of the furry lad, so s/he chases after the furry lad. Little did he know that he shook the ground and knocked down the we lass. She joins us, and we go after them. But me sees an oglop on the way. It took a few tries tae catch one, they be fast critters. But I get one and I bring it back to Bryan. He gave me a card with an oglop on it in return.
-I dae all of this without seein' a moonster, so I go to the furry lad by the stairs and he jots soomthin' down again.
Mountain Path
-Now for some treasure hunting and boss battle preparations. There are four items to pick up before the moogle, and I also want to get into a battle. I want a battle so that I can use my weak little mages to put Zidane's HP so that it ends in 7.
-After way too many tries, I find that both Eiko and Vivi can hit Zidane for 19 HP. If they both do that, he'll have an HP of 67. It was difficult to do, with many many resets, but I got it. Everyone remained alive after the battle too.
-And now to fight Hilgigars. First, I keep going until after the FMV in case I get into a random battle and have to reset, don't want to do all this re-equipping for nothing. Then, I set up everyone as such (pretty much following the guide, with some extras) which should maximize their AP intake:
Zidane: Gladius, Bandana, Mythril Armlet, Adaman Vest, Reflect Ring
Dagger: Stardust Rod, Bandana, Magic Armlet, Survival Vest, Magician Shoes
Vivi: Oak Staff, Mage's Hat, Glass Armlet, Silk Robe, Power Belt
Eiko: Golem's Flute, Lamia's Tiara, Glass Armlet, Magician Cloak, Magician Shoes
Zidane gets Distract, and Dagger and Vivi both already had Ability Up. Zidane and Eiko will get 9 AP, Dagger and Vivi will get 18. Dagger will get twice that for Clear Headed. Vivi will get twice that for Fira and Loudmouth. And Eiko will get twice that for MP +10% and Clear Headed.
-The strategy is to use Lucky Seven, getting 7777 damage, and then use Bio to finish the fight very quickly (or vice versa).
-So....Lucky Seven.....not so lucky. I tried this at least 50 times, not including the times that either Hilgigars started battle with Earthquake or with attacking Zidane and Distract not working. In all of those 50 times, not a single Lucky Seven did 7777 damage. You have no idea how frustrating that is, I thought all four possible damages had the same percentage chance of happening. I understand it's only a 25% chance, but 50 times in a row!!!!
-Then, I finally got 7777, and it was good, and the battle was fast. I even got an Elixir. But then there's a bit more treasure hunting to do. I got a random battle while trying to get the Green Stone. So I had to restart, thinking I was going to have to try 50 more times. But on my very next try, I got 7777 damage again. So very happy. But got a random battle just after getting the Green Stone. So I had to restart again. Then, on my next try, I got 7777 damage AGAIN! I was thinking that this had to be the one. I get all the way out of the Mountain Path, I take some steps toward Madain Sari, and milliseconds before I press [] I get a random battle...AGAIN!!!. I had to stop for a while, it was ridiculous, I was very close to hurling my PS2 out the window.
-So after after that bit of frustration, Lucky Seven starts working every once in a while, I'd say like 1 in every 6 or 8. That's fine, 1 in every 50ish is not fine. So in the battle that I ended up saving, I had Dagger cast mass-Float in case Hilgigars opened with Earthquake. She got KOed beforehand, so Eiko used a Phoenix Down, Vivi used Bio and Zidane used Lucky Seven for 7777 damage and the win.
-After the battle, Zidane learns Man Eater and Insomniac. Dagger learns Insomniac, Clear Headed and Antibody. Vivi learns Bio, Fira, Antibody and Loudmouth. Eiko learns Clear Headed and MP +10%. And I got both the Elixir and Tent for the spoils. I then get the Yellow and Green Stones, an Ether and hightail it out of dodge. I save half-way to Madain Sari.
Thank goodness I only have to use Lucky Seven in five battles in this challenge, here's one down.
Last edited by SeeDRankLou; 10-28-2007 at 07:29 AM.
Madain Sari
-This area is rather simple, just a bunch of scenes. Madain Sari is open in disc 4, and there are no missable items, so I don't have to get any of them. But if I want the Mini-Prima Vista (which I do), I have to get the Kirman Coffee.
-I skip making the best dinner, it changes one line in the game and that's it.
I get the Phoenix Pinion and Ore. When I get zombified later, I will be left with 9, 21 or 33 HP. With this one Ore I now have 11, so I can use an Ore on Zidane if he's left with 33 and he'll end up with 77 HP, for the Scarlet Hair battle later.
-I save half-way to the Mountain Path.
Moonstone #2
-Since I have the four colored stones, I can now get the second of three Moonstones, which is to the right of the moogle.
-Getting all the way back to the last shrine with no random battles is a bit tricky, need some stop-run action.
-I get the Moonstone and save at the moogle.
-And then I make it the rest of the way through the Mountain Path. Encounters were pesky, especially the last screen before exiting. But next time I don't have to take the long way, so it's fine. I save half-way to the Iifa Tree.

Last edited by SeeDRankLou; 10-05-2007 at 08:57 PM.
You seem to be doing really well on time.
Are you way ahead or is 5:42 about right for where you are?
Wow....according to the gamefaqs.com guide, I am 20 minutes ahead of schedule. Thanks for pointing that out to me.
Now, before I start with the Iifa Tree, let us once and for all end this silly argument about how this location is spelt.
Now, everyone sees the upper case "I", and and everyone also sees the upper case "L". Let the arguments end. And now....
Iifa Tree
-You know, this used to be my favorite place in the whole game. Even when doing an Excalibur II challenge, it was my favorite place, we could get into like 12 random battles here and be fine on time, no worries. But now....not only do I not have that much time, but I'm also at level 1. Stroper=death most of the time if it gets an attack. Also, all of the winding back and forth of the path in this area is just asking for random battles, which is not good.
-But first, I just have to get to the moogle and save. Some well placed stop-run action gets me through all but the last screen without a random battle, the last screen in which I got one. Before I save, Zidane gets the Ritual Hat to bring his magic defense to 19 and his evade to 17. Dagger and Eiko both get the Moonstone (since I have 2
-Alright, buckle down for this long segment. Every guide and video that I have seen tells you to go down, fight a Dracozombie and get Zidane zombied, come back up and save and go back down again. I don't like this setup. I think it's much faster to just go down and start treasure hunting. The random battle rate is kind of high, and the guides alot for 8 random battles. That's really good odds for fighting a Dracozombie, so why not kill two birds with one stone? I understand the logic behind the above setup, I just don't like it.
-Since I'm not coming back up and going back down, I can either save about a minute or I can get into a few more random battles. Either way, it will make this section easier, which is good because I want out of here as soon as possible. So I go down the elevator and equip Zidane with the Mythril Dagger and Bandit (which I should have done with the moogle before I saved, but oh well).
-The second screen has a switch that will lower a chest. Sometime in this screen I get a fight with a Dracozombie. With Zidane's current setup, Shell status and full HP, if he's hit by Zombie Breath he'll be left with either 9, 21 or 33 HP. I don't want 21 because that means I have to use a Sapphire to make his HP end in 7, and I only have one which I need for later. The other 2 will work though. Zidane steals a Magic Tag, which is what I wanted, and Vivi uses a Tent successfully. And crap hits the fan as Dagger gets zombied. So Eiko self-KO's, Vivi uses a Magic Tag and Zidane revives Dagger. Vivi self-KO's, Dagger uses Shell on Zidane, and Zidane KO's Dagger. Shortly after, the Dracozombie uses zombie breath again and Zidane gets zombied and goes down to 33 HP, which is exactly what I wanted. Then an elixir ends the battle.
-I go down to the next screen, flip the second switch, and go back up a screen. I get a Hi-Potion, Phoenix Down and Healing Rod. I go back down to the next screen and get an Ether, a Lamia's Flute and Remedy, and then go down to the leaf. All in all, I think I got 6-7 random battle excluding the Dracozombie fight, several of which Zidane started with nearly full ATB. Not too shabby. During one of these battles, I had someone use an Ore on Zidane. Since I had 11 Ores, it gave him 44 HP for a total of 77. (And if you guys go back and watch 1whoistornapart's videos, he skipped the Ether. I wonder if he knows about that)
-And now for some forced battles. The only thing to worry about here is Zidane getting hit. As long as that doesn't happen, everything should be fine. The first battle I only had to fight 2 Zombies, which made things a bit easier. One Zombie went down with an Elixir, and then I waited for the other to make it's move. Eiko got KOed, Dagger and Vivi self-KOed and Zidane used an Elixir to win the battle. After some dialogue Zidane says "Vivi...", and that's my cue to revive everyone. Then a Dracozombie battle. I waited for it to make a move (and I think it started with an empty ATB or something). It zomibed Eiko (poor Eiko in this segment), so Dagger and Vivi self-KOed and Zidane used an Elixir for the win. And everyone is still at level 1.
-After getting to the final area and some dialogue I get the Elixir and Brigandine. I use a Magic Tag on Zidane and Eiko and revive everyone. I equip Zidane with the Brigandine, Dagger with the Magician Shoes, Vivi with the Lightning Staff, Magus Hat and Peridot, and Eiko with the Lamia's Flute and Ruby. Zidane gets Ability Up.
-And finally, for the easiest boss in the game, Soul Cage. I either would have used Steal with Zidane and someone else throw an Elixir, in an attempt to steal the Brigandine, or just have someone throw an Elixir, depending on how everyone's ATB started. Getting this far with everything going well is no small feat, so this is one of those things where however this goes just take it. Dagger started with nearly full ATB while everyone else's was almost empty, so she threw an Elixir and won. Zidane learns Bug Killer and Distract. Dagger learns Ability Up, Silence, Locomotion and Blind. Vivi learns Slow and Ability Up. Eiko learns Float.
-After skipping an FMV, some dialogue and exiting the Iifa Tree, I take a few steps to turn the camera around and save. I ended up taking the "save about a minute" option.
Bounty Hunters, Round 2
-I didn't take that many steps out toward the Mountain Path, so this took several resets to not get a random battle. And then a few more not to get a random battle in the Mountain Path, but just a few on that one.
-When I get to the very end of the Mountain Path, I change some equipment around. Zidane gets the Gladius, Bandana and Chain Plate. Vivi gets the Mythril Vest. Eiko gets the Bandana and Silk Robe. Zidane equips Distract and Man Eater and Eiko equips MP +10%, Ability Up and Insomniac. This is my last chance to equip Eiko until she forceably joins the party in the Iifa Tree, which is why I'm re-equipping her here. I save half-way to Madain Sari.
-And now for some more Madain Sari fun. Except for the Scarlet Hair battle, this is just a bunch of dialogue. Dialogue, dialogue, dialogue. The only hard part of this is another Lucky Seven battle. And that is after half of this dialogue. The fingers get a little tired after several retries.
-So the Scarlet Hair battle could go in one of two ways to satisfy me. 1: 2 Lucky Sevens doing 7777 each. 2: 3 Lucky Sevens, 2 doing 777 and 1 doing 7777 damage. The first one is asking a lot, but it is possible, and the second one would only require one more round, which isn't too much more time at all. With Zidane's setup, he has 19 evade, which seems to work rather well against Amarant. After several retries, I got the latter, which I'm happy with. Zidane learns Devil Killer.
-After the rest of the dialogue, I name Amarant, switch him and Eiko in my party, go half-way to the Mountain Path and save.
Battle of the Bad Guys
-So now I make my way back through the Mountain Path (for the last time) and head to the Iifa Tree (for the last time). I equip everyone as follows:Zidane: Mythril Dagger, Ritual Hat, Mythril Armlet, Brigandine, Reflect RingZidane gets Distract, Ability Up, Insomniac and Bandit. Dagger and Vivi get Ability Up and Insomniac. Amarant gets HP +10% and Alert. Vivi's equipment is completely different from what the guide says, but this is as high as I could pump Vivi's Spirit, which is what I was going for.
Dagger: Multina Racket, nothing, nothing, Silk Shirt, Moonstone
Vivi: Lightning Staff, Bandana, Leather Wrist, Survival Vest, Fairy Earrings
Amarant: Cat's Claws, Ritual Hat, Mythril Armlet, Adaman Vest, Germanis Boots
-I save half-way to the Iifa Tree.
-This next section is very annoying. First, I need to get through the Iifa Tree roots as quickly as possible. And then I must rely on Stop 3 consecutive times. The higher in level these monsters get, the harder it is for Stop to work. Not to mention all of the dialogue.
-So, after many many many tries, I decided that it's ok if I get a random battle while going through the roots. This let me try the Mistodon battles about five times as often.
-The save that I kept, Zidane used Flee almost immediately during the random battle.
-During the Mistodon x2 battle, 2 Tents were used, both of which worked. And those were followed by 2 Stops, both of which worked. Zidane learns Bright Eyes.
-Then with the single Mistodon battle, Vivi got the first turn and Stop worked. Eiko learns Antibody.
-It took me a long time to get this save, and it was worth it. The only way this section could have gone better is without the random battle, but it was a fast random battle so very little time lost. Eiko gets the Magic Armlet, I read a letter from Stiltzkin and save.
-Since this next section is so close to a moogle, it wouldn't be too difficult to do it perfectly. The only hard part about this segment is making it to Dagger with just one battle with 1 Mistodon.
-After many tries, I got a battle where Vivi got the first move and Stop worked. Vivi learns Thundara and Eiko learns Insomniac.
-I make my way down to Dagger, go through all of the dialogue and FMVs, and save as disc 2 finally comes to an end.

Last edited by SeeDRankLou; 11-05-2007 at 06:35 PM.
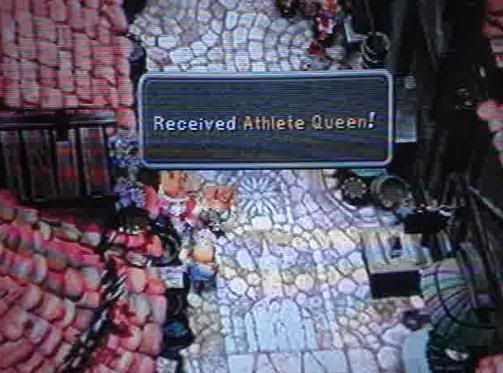
Athlete Queen is easy cheese. Have you ever actually gotten King of Jump Rope?
Twice. I'm not saying Athlete Queen isn't simple to get, but how fast have you ever gotten the Athlete Queen? Wait 'til you see my save.
Oh, I believe it. I could never get King of Jump Rope, myself. After 200 or 300, whatever it is, the timing gets all weird and I could never understand it. Seems totally random.
Athlete Queen
-As you can see earlier, I got the Athlete Queen.
-This section starts with some scenes, and then I take control of Vivi. He goes down to Hippaul and starts a mini-game.
-I don't know why everyone thinks that after the first 7 races that you can only increase his level by 1 each race. I didn't start doing 1 race per level until I got to level 60. Maybe I just do it faster, I don't know. I change the button configuration to switch the X and O buttons so that they are closer together, that's about it (I just had to remember to press O to speak to Hippaul's Mom).
-After I got the Athlete Queen (and rested while the game was paused), I return the button configuation to normal and go to the Square. I watch the ATE Artemicion so that I can read the letter he delivers. He also informs Stiltzkin that he has been delivering all of his letters (i.e. I have read all 6 of his letters so far).
-Then I go to the the bell tower, ring the bell to get 5 cards, buy Stiltzkin's deal, deliver a letter to Kupo and read the one he just got and saved.
Cheering Up Zidane
-Vivi makes his way to the theatre, scenes...scenes...scenes. When I gain control of Eiko temporarily, I unequip her of everything except her Ruby. Scenes...scenes....scenes....when I regain control of Zidane, he searches the pub for the 3 items I skipped way back in disc 1.
-I go to the bell tower and read the letter Kupo got from Stiltzkin and I save.
From the beginning of disc 3 to now, the guide alots 33 minutes to do this section. I did this section in 23 minutes. *Bows, bows, allows applause to fade...*
-Afterwards, I go to the theatre and get the gil on the ground. This isn't a missable item, but I wanted a little more money because I'm making one extra purchase than the guide says.
-Shopping: Synthesize a Barrette, and purchase a Plate Mail and Brigandine. The first two are for Freya gaining the exp from Tantarian, and the latter is for Amarant possibly learning Ability Up. I'm not sure I need it, but I'll buy it anyway. I'll have to have it at some point.
-Then I go to the dock, where Freya and Amarant almost duke it out. Pick up the Phoenix Pinion and gil, and take the boat to the castle. I then get the Ether, Phoenix Pinion and Lapis Lazuli. Then two areas to the left, there's a third Phoenix Pinion. I go ahead and pick up Leo while I'm there.
-Scenes, scenes, scenes.....I regain control in Treno. I watch the Memories by the Water and City People ATEs, which grants me the Chimera Armlet.
-I leave Treno and save half-way to South Gate.
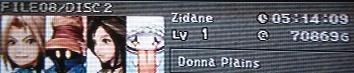
Road Trip!
-I need to go to Dali now. Not only do I need 99 more Wrists, but this is the only time I can get a few items.
-I go through South Gate and save half-way to Dali.
-I enter and go to the Mayor's House. I get the Mini Brahne and the Mayor's Key. Then I enter the windmill while it's stopped and get a Cachusha and Elixir. Then I use the Mayor's Key and get the Burman Coffee and 30,000 gil. Before I leave I buy 99 Wrists.
-Then I go to the Observatory and trade in my coffees for the Mini Prima Vista.
-I save half-way to South Gate.
-Then I go through South Gate and save half-way to Treno.
Card Torunament
-Now I get to play Tetra Master. But first, I go synthesize 99 Cotton Robes.
-Then participate in round 1. Using the Shiva, Ramuh, Nova Dragon, Tantarian and Armstrong cards I get a perfect win and all of his cards.
-There are two ways to get a Namingway Card. One is from the Desert Palace, and the other is here. If I don't send Vivi out of Treno (which I didn't), there's an ATE after round 1, Hippo's Prize. If I watch that, then Mario of the Slums will be my round 2 opponent, and he uses Namingway Cards. So this is the other way to get them. So I do this.
-During round 2, using the same cards, I somehow get another perfect game, so I get all 3 Namingway Cards that he played, which is really cool.
-I decide to save now and not chance anything going wrong with Catoblepas.
-Now it's time to defeat the second arena monster, Catoblepas. The easy way to do this is to use Lucky Seven and do 7777 damage. If Zidane gets KOed in this battle, he'll come back with 1 HP. So I can then use a gem to make his HP end in a 7. I currently have 11 Ores, if I had 9 then Zidane would be healed for 36 HP so he would have 37. I thought I needed to use the Sapphire I had, but I don't.
-So Zidane gets the Gladius, Bandana, Chimera Armlet, Bronze Vest and Reflect Ring, and deactivates Distract. I buy a Coral Sword, sell 2 Ores and my 99 Cotton Robes while I'm in the sell window.
-I fight Catoblepas and it uses Thundara to KO Zidane. Then Zidane activates Distract and Jelly. I fight Catoblepas again. Zidane gets the first turn, and I use an Ore, which puts his HP at 37. Then Catoblepas uses Devil's Bell, which does nothing. Then Zidane uses Lucky Seven for 7777 damage and the win. I get 15000 gil for my victory. This took maybe 10 tries.
-I go back to the moogle, who gets a letter from Kupo about the Athlete Queen, and I save.
-I have decided to let Freya absorb the exp from Tantarian instead of Zidane. It's kind of fun playing a level 1 game, so I'll let Freya sit it out for most of the rest of the game. And, her taking the exp affects only her max magic, which for her will only affect her max MP. I don't think that's as important as Zidane's max strength and max HP. Plus, I don't need to sit through an auction and get a Dark Matter. So, on to the last round.
-I didn't get a perfect game like last time, but I won. I took an Oglop Card with just one arrow as my prize, don't know why, probably doesn't matter. I get the Rebirth Ring, and then it's off to Alexandria. Too bad I can't save beforehand.
Alexandria Attacked
-After some scenes and an FMV, I delegate assignments for the Knights of Pluto, for which I get Angel Earrings. Then, Steiner and Beatrix are off.
-I unequip everything from Steiner. If one "optimize"s Beatrix, one will find that only her accessory changes. She has a Yellow Scarf on, and optimizing her will give her the Madain's Ring (or the Rebirth Ring if I wouldn't have gotten that). This actually lowers her magic defense, so there's no point in doing this. I don't know why the guide instructs you to do so. If you remember from her last battles, Beatrix was at level 13.
-Fight 1 can be skipped with a some slightly tricky footwork.
-Fight 2: Steiner self-KOs. Beatrix uses an Elixir and wins. She goes up to level 15.
-Fight 3: Beatrix uses 2 Full-Lifes and wins. Up to level 18.
After this, I take all but the Plate Mail off of Beatrix and give her an Elixir.
-Fight 4: Beatrix uses an Elixir and wins. Up to level 19.
-Fight 5: Same and fight 4. Up to level 20.
-Fight 6: Beatrix uses Full-Life and wins. Up to level 21.
-Figth 7: Beatrix uses 2 Full-Lifes and wins. Up to level 22.
During the last fight she has to start with empty ATB because Steiner is suppose to trance here (you know, I have not had a non-forced trance in this game yet). For most of the single Mistodon fights Beatrix started with enough ATB to go first. All in all, it was a good run. I got a few Ethers and Peridots too.
-Interesting note: During one of my tries, Full-Life missed one of the Mistodons. This only happened once though. I guess only an Elixir is sure to work.
-Now for some more scenes. Dagger runs up to the platform, skips some FMVs and summons Alexander. Zidane's group arrives at Alexandria.
-I run up to the guardhouse and save.
Tantarian
-Holy freakin' crap, I got lucky with this one. This so makes up for the Amarant battle. I tried this battle 70ish times yesterday, not including the ones where Tantarian opened with Paper Storm and KOed the whole party. Relying on Lucky Seven to do 7777 damage 3 times in a row, with the possibility of one or two 7 damages in the mix, is a true test of patience. 80%ish of the time I opened with either 77 or 777, so I had to reset. Then sometimes Zidane would get a Doom and the phoenix down wouldn't do a 7. Many many tries, many many failures.
-So, I wouldn't touch Vivi's equipment since he'll be KOed at the end of this battle, but he has the Survival Vest and Zidane needs it, so first he gets a Mythril Vest. Zidane gets the Survival Vest. Freya gets the Barbut, Mythril Gloves, Plate Mail and Barette. The first 3 up her Spirit by 4 points total. The Barette raises her Strength by 3, Magic by 1 and Spirit by another 1. Zidane loses Distract and activates Antibody.
-Zidane gets the first turn, Lucky Seven does 7777 which opens Tantarian. The other 3 give Tantarian a Hi-Potion each. Freya gets Poisoned, she uses an Antidote. Zidane uses another Lucky Seven for 7777 damage again. Vivi gets Poisoned. Zidane uses a third Lucky Seven for 7777 damage. That's right, 3 times in a row. I'm talking about some serious luck here. Then Vivi and Amarant self-KO and Freya KOs Zidane. Then Freya goes in for the kill. I don't know if it would have been faster to wait for Zidane to self-KO, but it probably wouldn't have made much of a difference.
-Freya levels up to 18 and gets almost her max stats along the way. Freya learns Bug Killer, Undead Killer, Man Eater, Gamble Defense, Chemist and Locomotion. I get the Running Shoes as a reward for my efforts. It's too bad that only Freya can benefit from this 30 AP.
-After, I run up to where Dagger is. Skip some dialogue and some FMVs, then wake up in Lindblum. I get two treasures.
-I get a letter to deliver and save.
Same old Lindblum
-This is the same as the last Lindblum visits, except MUCH LONGER. Most of this section is just a bunch of scenes that I have to go through.
-I deliver a letter to the moogle in the inn and get the three potions from around town. From this point on, nothing in Lindblum is missable. But I went ahead and picked up the gil from the tantulus hideout, the Lapiz Lazuli and the Chimera Armlet.
-Then I took the Blue Narciss to the shore by the Qu's Marsh on the Outer Continent and saved in the same spot I save when I left Fossil Roo.
Black Mage Village....or lack thereof
-I walk to the chocobo tracks, call Choco, and go to the Black Mage Village.
-This is just a couple of scenes. On the way around, I get the Black Belt while there's no one guarding it.
-I take Choco back to the Blue Narciss, and take that to the shore by the Desert Palace. I walk a little ways in and save.
Small hiatus. My dvd player broke, so I bought a dvd recorder (and they're rather cheap too). I'm currently trying to hook everything up and see how well it works and all that good stuff. I'll be back soon.
Last edited by SeeDRankLou; 11-05-2007 at 06:41 PM.
I'm having trouble with video editing software and all that stuff, so I'll leave it for a while.
"And I want to send you because you're too stupid to use magic."
-I go the rest of the way to the Desert Palace without a random battle.
-After the dialogue, I choose Freya, Steiner and Amarant to go with me. Normally I would leave Steiner with Vivi, but Steiner has a pretty sweet move with his Coral Sword that will be a great help against Ark.
-The guide allows 2 random battles while trying to get to the Hilda Garde I, but I only got one.
-It's too bad that the Forgotten Continent nameplate is showing while the ship is landing, or I could probably have made it very close to the chocobo track. But I suppose I'm close enough.
Forgotten Continent Maze
-It's been a while since I've played this part, I forgot how easy it is to get lost here.
-I make my way to the chocobo tracks (and thank goodness there are some) and call Choco. I wind through the cliffs and make my way to Oeilvert.
-And now for some shopping. There are quite a few missable items to be bought here, especially since this area is closed in disc 4.-1 Diamond Sword. One for Steiner plus one. I'm about to find one in Oelivert, so that makes 2.I also bought a Magic Racket (for Dagger much later), 1 Gold Helm and Cross Helm (plus Beatrix's makes 2), some Phoenix Downs and Softs. That should do me.
-2 Tridents. One for Freya plus one.
-2 Mythril Claws. One for Amarant plus one.
-2 Fairy Flutes. One for Eiko plus one.
-1 Silver Fork. One for Quina plus one. I get one for catching frogs, so that's 2.
-2 Diamond Gloves. Two for the knights plus one. I will find one in a chocograph much later, so that's 3.
-7 Green Berets. Six for the non-knights plus one.
-7 Judo Uniforms. Six for the non-knights plus one.
-3 Gold Armors. Two for the knights plus one.
-I got a letter to deliver and saved.

Last edited by SeeDRankLou; 11-05-2007 at 06:43 PM.
You're a hero, Louis.
Just wanted to let you know that I'm keeping up with your progress and cheering you on. If I wasn't so swamped with school I'd have totally taken on this challenge with you.
Thanks Jeremy. I figured that since the views of this thread are about 25 times the posts (and most of the posts are mine), people are keeping up with my progress. Still, it's nice when it's actually said
I think that if I get through the challenge with enough of a lead, and I figure out how to get a video file from a dvd+rw, I will take a break and then do this challenge again and record it. But I won't skip the FMVs. But, that's a ways away, just a thought I was having.
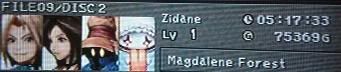
Oeilvert
-Random battles posed a bit of a problem on the way in, I had to reset several times.
-When I get in, I go up the stairs to get the Rising Sun. I go left, activate the blue orb and get the Elixir. I go back, go down the stairs, get the Remedy and go right.
-When holograms start getting activated Stiltzkin will move on, so his deal must be bought before then (I'm not sure how many need to get activated before he moves on, so better not to chance it).
-I buy Stiltzkin's deal (2nd Emerald), deliver a letter to Mimoza and save.
-Man it was either 2 random battles or no random battles with this place. And the game was being a bitch about the second battle sometimes. 3 times I got the second battle a step away from the moogle. The third time...well....luckily my floors have carpet.
-So, I optimize Steiner, then Freya, then Amarant. I only cared about a few of the items. Steiner gets the Diamond Gloves, Freya gets the Diamond Gloves and Power Belt, and Amarant gets the Green Beret and Rebirth Ring. Then, Zidane gets the Bronze Vest, and Amarant gets the Adaman Vest. Amarant activates Ability Up and Auto-Life, and everyone else activates Jelly.
-I want to get into one random battle in this area with an Epitaph. Epitaphs give 2 Ap and no Exp, so there's no leveling when it's killed. Also, since it's a stone-type monster, it's easily killed with a Soft. At long last I got a run where I only got one random battle with an Epitaph. Amarant self-KOs and auto-revives. Freya hits herself, but since she's now at level 18, even with her strongest weapon her HP only goes down to 76, which is fine. Zidane and Steiner self-KO, and Amarant throws a soft to kill the Epitaph. Amarant learns Stone Killer and Bird Killer (which is why I gave him the Adaman Vest).
-There are four chests to get, I get all of them, activate the last hologram and save.
-Ark is hard. It has four attacks. Whirlwind and Boomerang will KO the entire party. Photon will bring a character down to 1 HP, and Propeller Wind will cause Confuse to everyone. With Clear Headed on everyone, Propeller Wind will do nothing. So in this battle, Ark needs to not use Whirlwind or Boomerang, needs to not use Photon against Zidane, and Zidane needs to have Lucky Seven do 7777 damage in two tries. I'd say this all has about a 15% chance of happening. And, each time this fails, I would have to revive Zidane for 7 HP, which has a 10% chance of happening, and do a rather massive equipment change and ability assignment. So, the preperation for Ark gets its own section.
-I revive Zidane and Steiner until Zidane gets 7 HP. Then, everyone is set up as follows:-Zidane: Gladius, Green Beret, Glass Armlet, Brigandine, Yellow ScarfEveryone activates Bird Killer, Clear Headed and Ability Up. Zidane activates Distract. Freya activates HP+10%, MP Attack and Gamble Defense. Steiner and Amarant activate Accuracy+. Zidane will learn Ability Up and Steal Gil twice as fast, Amarant will learn Ability Up three times as fast, and Steiner will do 50% more Thunder Damage.
-Freya: Trident, Lamia's Tiara, Diamond Gloves, Chain Mail, Power Belt
-Steiner: Coral Sword, Gold Helm, Thunder Gloves, Chain Mail, Lapis Lazuli
-Amarant: Mythril Claws, Green Beret, Egoist's Armlet, Brigandine, Lapis Lazuli
-Everyone goes to the front row, and I save. I ended up doing all of this in less than a minute, so I'm happy.
-Charge! is a really cool ability. This is actually the first time I've ever used it. Zidane would hit for about 400, Freya for 1400, Steiner for 1100 and Amarant for 800.
-The Ark battle is another test of patience, but not so much as the Tantarian battle. I beat Ark several times, but I can't save after. It just goes straight to that Hourglass Key mini-game, which is really hard to do fast when you are trying to do it fast. I found that the key to doing it fast is to not do it fast.
-I run around and get the Gaia Gear, and then fight Ark. The Ark battle that I kept went as such...Amarant used the Rising Sun for about 2000 damage. Ark Photoned Steiner, he already had 1 HP so it did nothing. Freya attacked, Steiner used Charge!, Zidane used Lucky Seven for 7777 damage and Amarant attacked. Ark used Propeller Wind, which did nothing. Freya attacked and Steiner used Charge!. Amarant was the fourth to attack with Charge!, and Ark went down.
-Zidane learns Steal Gil, Antibody and Bird Killer. Freya learns HP+10%, Bird Killer and MP Attack. Steiner learns HP+10% and Bird Killer. Amarant learns Curse, Beast Killer, and puts a massive 66 points toward Ability Up. Ark drops the Pumice Piece. I unequip everyone and get the Gulug Stone.
-Next is the Hourglass Key mini-game. I went slow, and it took about a minute to get the key, but I didn't mess up once. I had to frustratingly reset 3 times because of messing this up too much.
-After the mages reunite, I go right to a moogle, get a letter to deliver and save.

Last edited by SeeDRankLou; 11-05-2007 at 06:47 PM.
God, I never thought about how annoying the hourglass key part would be to do in this challenge right after a boss battle.
 Posting Permissions


 Reply With Quote