View Poll Results: Where should we move?
- Voters
- 16. You may not vote on this poll
-
Beach
-
Desert
-
Evil Forest
-
Glacier
-
Island
-
Mountainside
-
Tundra
-
Woodland
-

Haha, good point.
My mod is smurfing insane. I have only had one migrant wave and three sieges, two Orc and one Frost Troll. The first and second sieges are interesting combats, but I will talk about the third while we wait for Jess to get off her big Italian ass to update. (ilu really Jess!)
The third siege had 32 orcs (consider that I had 26 Dwarves total at the time, reduced to a military of 6 thanks to a few losses) and featured two squads led by an Elite Bowman and a Hammer Lord.
Let's take a look at my outer defences.
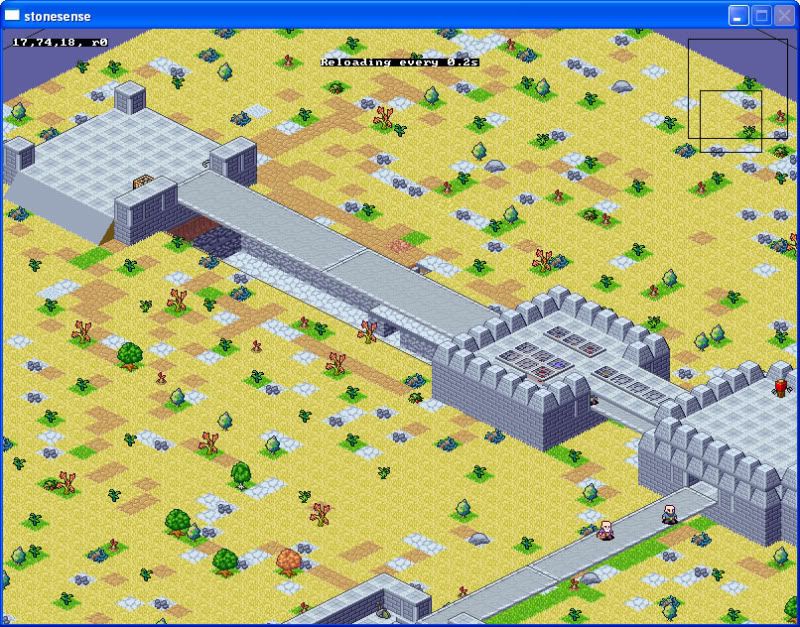
The three towers are taller than this but I've gone down some levels so you can see. Essentially the tower in the middle is my trade depot, the tower on the right is my fortress entrance and on the left is there just to keep my foes in one place. The bridges both retract, meaning I can seperate my trade depot from the outside world and still be able to access it from my fortress, and the bridge on the right is in case the trade depot is breached. Above it we have the Marksdwarf catwalk (and the entrance to it is completely seperate from the fortress entrance in case of breaches) and they can pump bolts into the two right hand towers from above if needs be.
Squad 1 shows up first with the Elite Bowman, and I know I cannot possibly hope to take that asshole. So I iniate Plan: Elven Destruction, and drop the bridge out from under them as they duel the human guards on it, causing them all to drop into the pit I dug for Elves. All the humans on the bridge were killed in the fall and the Orcs that went in were crippled, but as they feel no pain or fear it didn't stop them. What did stop them, however, was a Human Bowman (or bow-woman, actually, named Emeg Pishuhnil) who was still in the depot and merrily fired arrows into the pit that the crippled orcs were crawling their way out of, backed up by my Marksdwarves, Pikachu and Jolteon. (oh yeah, this is a Pokemon themed fort. RIP Psyduck and Charmander  )
)
The Elite Bowman chose not to cross the bridge, however, and held some forces in reserve. So I lowered the bridge, daring him to cross. This knocked poor Emeg off the tower and onto the ground (thankfully not into the pit, she landed just next to it) breaking her leg. An Orc Axeman bore down on her to get the killing blow but despite her wounds, she took him down. Then the Bowman decided he wanted to kill her point blank and marched down there with what remained of his squad and did so, Emeg dying with an impressive seven kills. This distraction allowed my Marksdwarves to eliminate the Elite Bowman and the rest of his boys.
With him down I was prepared to lower the bridge to the Trade Depot and send in my four Wrestlers, Ponyta, Vulpix, Squirtle and Shellder. They have no weapons or armour because right now I am too smurfing poor to make any. (although with this siege, I think I have a lot of smelting to be doing) and at this point, the Human Guild Leader decides this is a great time to leave the fortress, and I hold my breath as the Hammer Lord's squad closes in, but luckily the Guild Leader got away. I couldn't cope with the Humans joining in on the sieging fun.
This time I know I cannot drop the bridge as my four boys are already on it. The Hammer Lord charges across, alone, presumably because he is that much faster than his squad. This is pleasing as he is out-numbered and gets taken down quickly. However, the tide soon turns as his squad of Spearorcs and Axeorcs come pouring across the bridge, and now it is the Dwarves who are out-numbered.
The numbers game causes all four of my wrestlers to go into a Martial Trance, and they charge across the bridge, not stopping as they throw Orcs off it left and right, and I am in awe as the siege is lifted.
Amazed I had 0 losses in this one, as I had lost Dwarves to lesser forces. I think I was largely helped by using the humans as a meatshield, and the heroism of Emeg.
 Posting Permissions
- You may not post new threads
- You may not post replies
- You may not post attachments
- You may not edit your posts
-
Forum Rules


