-
 Vivi builds an arcade stick.

I was going to wait a bit, but I'm getting close to the end of this thing so I figured I'd start the thread early. I've been working on building an arcade stick controller for my Dreamcast so I thought I'd share some pictures along the way.
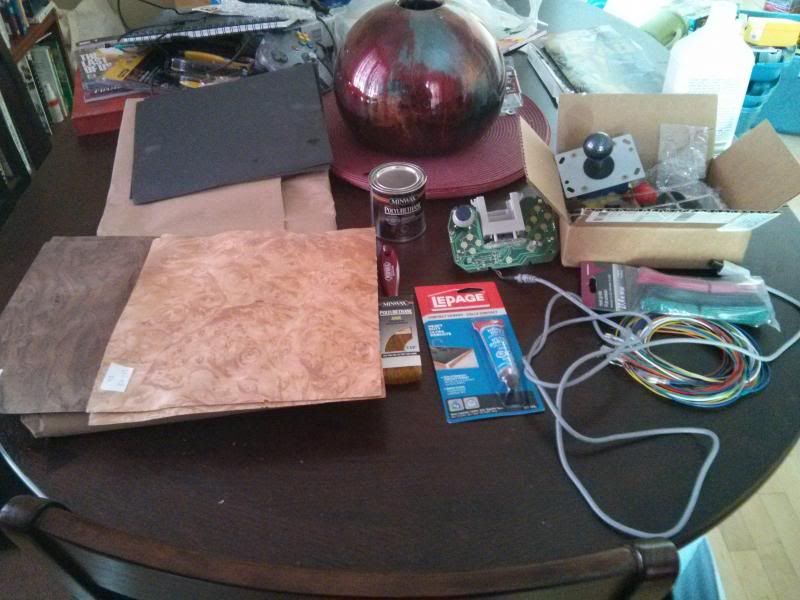
First up are the materials. The controller is some old Madcatz I found for $10. Worked fine so it suited my needs. And honestly, I would have felt kind of bad taking apart a first party controller in case things went horribly wrong. I don't have an actual picture of the controller, just the PCB after I took it apart. Two of the screws actually would not come out, and drilling them failed to accomplish anything so I actually had to carefully cut the plastic away until I could get the circuit board free. It was a pain in the ass and my hand was sore when I finished.
Also pictured is some sweet wood veneer and the Polyurethane I was going to use to finish the case once it was done. I've since realized that with my lack of woodworking skills and some poor planning there's going to be no easy way to actually apply it before assembling everything. So I'll have to use the wood for something else in the future. My backup plan to be explained shortly.
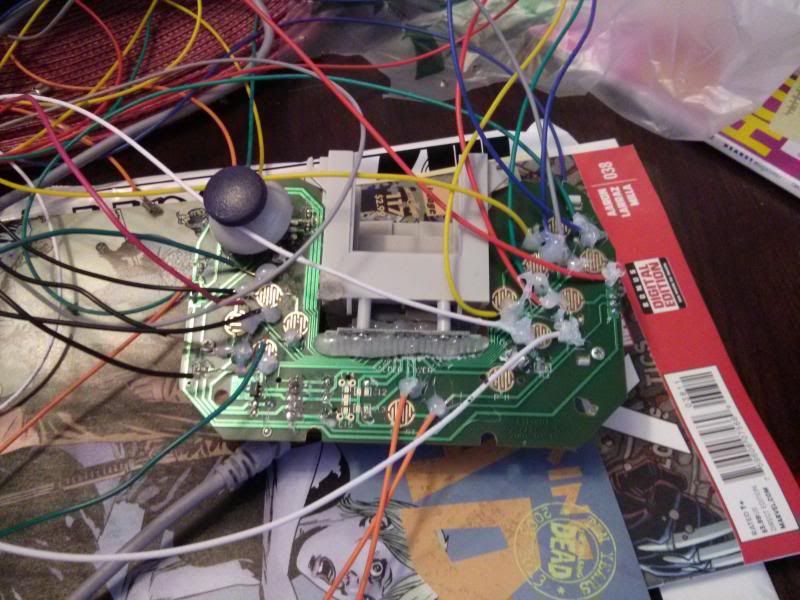
Here's the PCB all wired up. I used the hot glue to give some extra hold to the wires I soldered on. It doesn't conduct so there won't be any issues. I actually ran out of hot glue at the time so I'll probably add a bit more before putting it in the case. Attached the buttons long enough to test it and it all worked perfectly right off the bat so yay me!
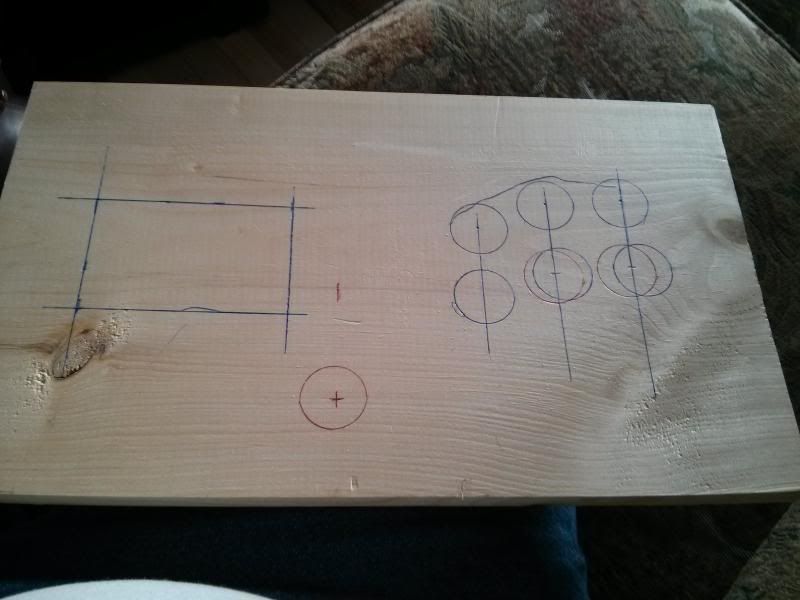
Button layout for the top. I've since cut away the holes and filed and sanded it all down to get everything to fit with the exception of the start button at the bottom which I'll be finishing tomorrow. For the buttons, I laid them out roughly the way my fingers lay on the board. I started by letting my fingers rest naturally, drawing a line around the tips of my fingers to follow, then tried to space things more or less evenly. As for what I used to trace out the pattern for the buttons...
30mm buttons, 30mm base. Worked like a charm.
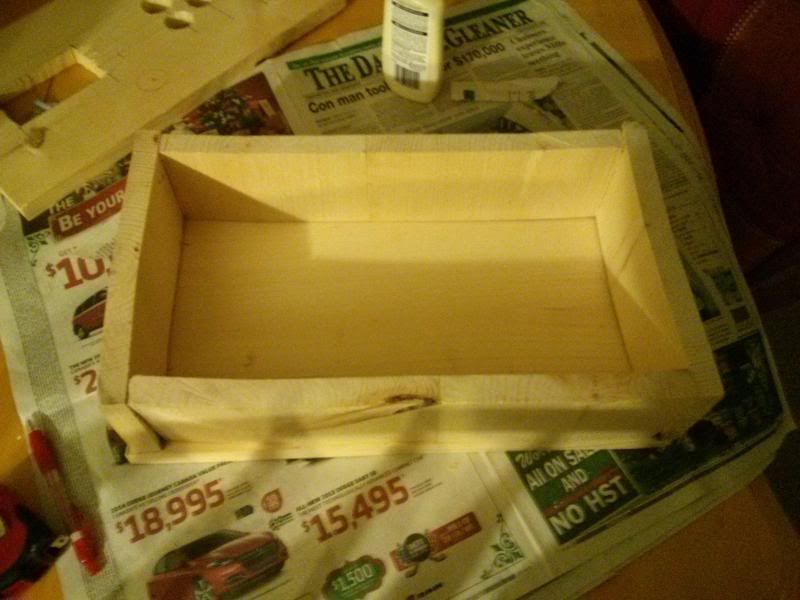
Roughly assembled lower half to the box that will hold everything. I got a bit unlucky in that the board started to curve before I got it cut and assembled, but I think I'll be able to get it worked out in the finishing stages. My wood working experience is pretty minimal, but I think I've got the solution worked out. Or at least a solution. If it doesn't work I'll just buy another board. This one only cost $5.
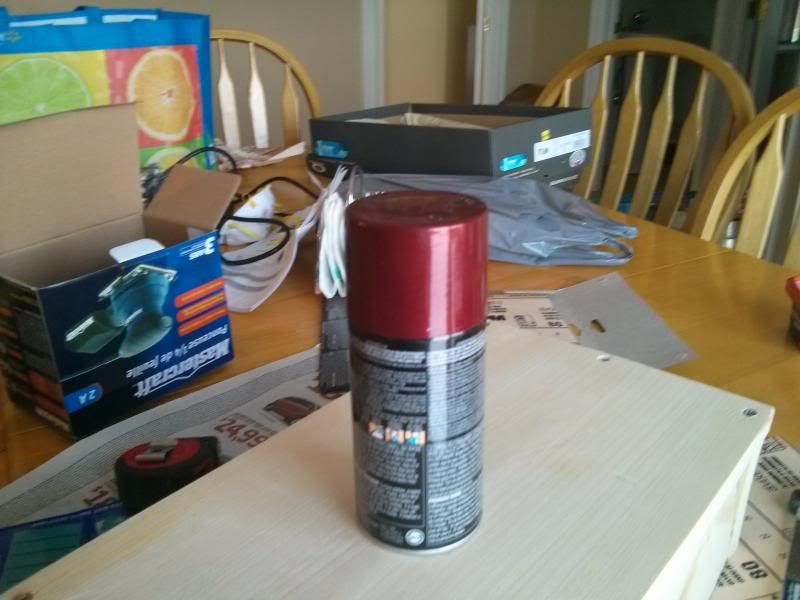
Last one for today is the paint I'm going to use to paint the case. I'm going with some red sparkle automotive paint, and I've got a gloss clear coat to spray over it after. I'll be testing this tomorrow on a scrap board. If it doesn't take well on the board I'll try priming it first. Should that fail I'll work something else out.
More updates in a day or two as things move forward.
EDIT: Minor update. Even in a well ventilated area like a garage with an open door, automotive paint is the most vile smelling thing in history. Keep the old breathing mask on until you get back into the house. :S
Last edited by Slothy; 01-08-2014 at 02:47 PM.
 Posting Permissions
- You may not post new threads
- You may not post replies
- You may not post attachments
- You may not edit your posts
-
Forum Rules


 Reply With Quote