Page 4 of 12 FirstFirst 12345678910 ... LastLast
Results 46 to 60 of 166

Thread: Photoshop Lessons and Sig MAKING Help

  1. #46

    Default

    Quote Originally Posted by rubah

    If you gave me a box of crayons and an average kindergarten student a set of oil paints, I could pwn just about anything they tried to create.
    You're proud of this?

    Plus, PS7 is wayyyyy out of date! I'm using CS 8.0/CS2 9.0

  2. #47

    Default

    Quote Originally Posted by MEF
    You're proud of this?

    Plus, PS7 is wayyyyy out of date! I'm using CS 8.0/CS2 9.0
    You are completely missing the point.

    I'll bet that if someone were extremely good in gimp, you wouldn't be able to even tell that it was made in gimp. I've seen people who use the program that well, and I and many others thought that it was photoshop work until they said that they used the gimp when asked. Same goes for PSP. Really, just because someone has photoshop does not mean that their graphics are automatically better than anyone elses.
    Last edited by Cybele; 11-07-2005 at 03:39 AM.

  3. #48

    Default

    can someone pleaz give me some help on how to use GIMP i just downloaded it and i have no idea whatsoever how to use it,, how do u get an image u want in there??
    thanx alot.


    "when u tell people your dreams and visions they'll laugh and think your stupid,but if u hold on to them in the end you will be laughing and theyll be stupid"

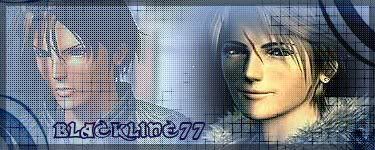
    thanks to FF7+FF10 gurl 100 for this great sig...

  4. #49

    Default

    could you use something like Microsoft Pictureit! for sigs?

    aoki yasei wo daite
    embrace the untamed wilderness

  5. #50
    permanently mitten
    Goddess of Snacks
    Miriel's Avatar
    Join Date
    May 2002
    Location
    San Francisco
    Posts
    13,578
    Blog Entries
    3
    Contributions
    • Former Cid's Knight

    Default

    Quote Originally Posted by KH1992
    could you use something like Microsoft Pictureit! for sigs?
    You could, but that program doesn't exactly have a lot of features you can use to make a really creative signature. The most you could do with that program is a little color correction, editing out red-eye in photos, etc. It's not exactly a program for creating digital images as it is for organizing family photos and such.

  6. #51

    Default

    seems to work fine for me... you can soften the edges of the picyures and things like that... i don't know...

    aoki yasei wo daite
    embrace the untamed wilderness

  7. #52

    Default

    If you want to make good signatures like my current or the ones in my newest photobucket album then you need four great websites.

    First:
    Gamerenders-
    This site will provide you with amazing pictures for your signatures. This site also has a section where tutorials of any kind can be found. (Mainly photoshop tutorials) This tutorials will teach you how to use photoshop, how to make a basic signature, and how to make an amazing signature.
    Second:
    ChaosGFX-
    This site is mainly tutorials. It is another great place to find out how to make quality signatures and basic ones for beginners.
    Third:
    Pixel2Life-
    All tutorials. Some great ones and some average ones. Tutorials come from all over the internet from every type of board and will teach you a variety of skills.
    Fourth:
    Greycobra-
    This site also has tutorials, but not as many tutorials as the others. Mainly it has a signature showoff area where people who are skilled in photoshop will comment on your work and help you to better it. It is a great site for critique.

    Hope this helps all of you out there. With practise these sites will be able to help you better your photoshop skills. Also, experiment and try to come up with your own personal style. Good luck!
    [leeza]Filesize limit is 50 kb. Please read the sig restrictions posted above the sig field and PM a Knight/Admin if you do not understand them.[/leeza]

  8. #53

    Default Lesson 3: how to write chalk hand writing?

    Well, here I am, and I`m sorry for being late:
    This lesson is short, but it`s very interesting. Let`s do it:
    oh..by the way, there`s no any picture in this lesson because I have problem in uploading, so I`m sorry :
    1- open a new page.(Control+N)
    2- paint the page into green.
    3- write whatever you like in white color.
    4- go to the third small box on the right, and then go the layers- dissolve.
    5- Finally, go to Filter-blur-gaussian blur.

    The Six Heros
    "Train Train Take us away...Take us away away away"

  9. #54
    Actual cannibal Pheesh's Avatar
    Join Date
    Apr 2004
    Location
    'Straya
    Posts
    8,371
    Articles
    4
    Blog Entries
    5

    Default

    how can i reduce the actuall file size of sigs i make. I am getting better at making sigs but i find that they exceed the sig restrictions of eoff by many KB's. Any tips you guys can give?

    Stay Essential
    EE

  10. #55

    Default

    Well, if you have image which 600x800, for instance, use right click and go to select all; and you see the pic is selected. Then, right click again and go to free transform. Finally, you control on the image by making it small or enlarge it. Good Luck ^_^

    The Six Heros
    "Train Train Take us away...Take us away away away"

  11. #56
    Actual cannibal Pheesh's Avatar
    Join Date
    Apr 2004
    Location
    'Straya
    Posts
    8,371
    Articles
    4
    Blog Entries
    5

    Default

    I meant the file size, not the image size. How can i reduce the KB's?

    Stay Essential
    EE

  12. #57
    ZeZipster's Avatar
    Join Date
    Sep 2002
    Location
    act or process of locating (lo-kashon)
    Posts
    2,303

    Default

    Quote Originally Posted by eternal essence
    I meant the file size, not the image size. How can i reduce the KB's?

    Stay Essential
    EE
    http://www.no-designs.net/forums/ind...?showtopic=258

    That's only if you're using Photoshop though.

  13. #58

    Default

    Quote Originally Posted by Lady Selphie
    Ok, here`s the first lesson as I said. Before we`ll start, I want to say that I`ll teach you what I have learnt, and I will put a new lesson in any day of week. Ok, here we go.

    Step 1:Choose any image you like and let`s chooseSquall`s image.

    Step 2:Squall`s image size is 350 pixels x 263 pixels. Create a new file with File> New, or Control+N. Then put these sizes as this diagram.

    Step 3:We need putting these sizes because we want the image size like the image size of Squall`s image.
    Note: you may choose any image which their sizes are 500 x 200, or 400 x 300, etc.

    Step 4:Go to Squall`s image and press the Rectangular Marquee Tool (M), or press M which you`ll find it on the keyboard, as the diagram shows

    Step5:Then, use select all by right click on Squall`s imgae and it will show you this

    Step 6:After that, use Control+C which means copy. Go to the empty image size picture and press Control+V which means paste.

    Step 7:And now, the empty image size picture becomes a copy of Squall`s image, so close the original one, and let`s start with the copy one.
    Note: I did those steps because the original image is locked, so I can`t do anything on this image, unless you can copy it. If you have imgae which is not locked, there`s no need to do those steps.

    Step 8:In the copy one, you will see that the name of the picture is called layer, as in this diagram

    Step 9: Create a new layer by Layer> New> Layer, or Shift+ Control+ N, or by this icon as you see it in this picture

    Step 10:After creating a new layer, they will become two layers. The first one is Squall`s image which is layer 1, and the second is empty layer which is layer 2. Go to layer 1 and use select all as I have explained.Then, copy the image and go to layer 2 and paste the image in layer 2

    Step 11:Select layer one, and go to Filter>Blur>Guassain blur.

    10-Selcet layer 2, and transform the picture from normal to soft light.

    Finally the image will be like that

    There are some samples which are about our lesson:


    Ok, that`s all today, and I haop you will understand me.

    I can't get step 8. I can't get it to say layer 1 all it says is background, can u explain it. Sorry

  14. #59

    Default

    Well really all you do is go to Layer and go to New and click Layer...I think.
    Hope that helps

    i'm giving up,
    on the entire human race....

  15. #60
    Actual cannibal Pheesh's Avatar
    Join Date
    Apr 2004
    Location
    'Straya
    Posts
    8,371
    Articles
    4
    Blog Entries
    5

    Default

    Quote Originally Posted by ZeZipster
    http://www.no-designs.net/forums/ind...?showtopic=258

    That's only if you're using Photoshop though.
    Thanks so much.

    Stay Essential
    EE

Posting Permissions

  • You may not post new threads
  • You may not post replies
  • You may not post attachments
  • You may not edit your posts
  •