Page 7 of 12 FirstFirst 123456789101112 LastLast
Results 91 to 105 of 166

Thread: Photoshop Lessons and Sig MAKING Help

  1. #91
    navmaldeuh Madonna's Avatar
    Join Date
    Aug 2003
    Location
    Yencreb
    Posts
    3,624
    Blog Entries
    1

    Default

    No, you don't, else you wouldn't have a transparency, so it's a .gif or .png. Those are wonderful formats, especially when you're only doing signature work. .jpg should only really be used for large images, like wallpapers, photos, drawings, and the like where a little loss and bleeding isn't so bad. It's a very lossy format which with large filesizes.

    Besides, it's good to branch out and familiarize yourself with different formats so you can learn how to best save your work and reap the maximum benefit. Cheers.

  2. #92
    Reno's my man! <3 Fire_Emblem776's Avatar
    Join Date
    Jan 2005
    Location
    Juban, Japan
    Posts
    1,116

    Default

    How do you take out the color in a picture? I have the picture done, but i want it to be in black and white.

  3. #93
    MacWerewolf Owen Macwere's Avatar
    Join Date
    Apr 2006
    Location
    With the angel that saved my world!
    Posts
    5,137

    Default

    Quote Originally Posted by Fire_Emblem776
    How do you take out the color in a picture? I have the picture done, but i want it to be in black and white.
    simple enough. do this;
    Image> mode> grayscale
    that is if your whole image is one layer.
    I <3 you Polaris
    ~Antratica forum~ You know you want to join =p

  4. #94
    Reno's my man! <3 Fire_Emblem776's Avatar
    Join Date
    Jan 2005
    Location
    Juban, Japan
    Posts
    1,116

    Default

    Got it, thanks

  5. #95

    Default

    I just took it upon my self to make a tutorial on how to make curved edges 
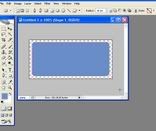
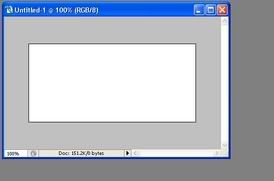
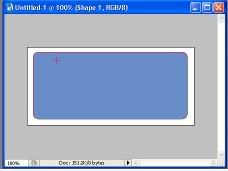
Heres how. Oh and this is for Photoshop! Probably translatable but im not sure how, sorry :

    So, you see this button?


    You click on it and select the one that is a 'Rectangular Marquee'

    So next you open a new canvas. I always open mine to 333x155


    Next you select the part you want as edged like this:


    If you want it transparent, you just delete the backround and your done! 
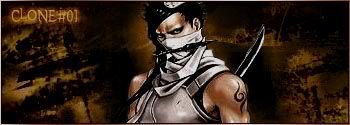
This is the end result


    Hope its useful for someone Heres one of my results:


    Ill probably make a tutorial later how to make that sig Later!

    i'm giving up,
    on the entire human race....

  6. #96
    Banned ~SapphireStar~'s Avatar
    Join Date
    Dec 2005
    Location
    Matt Bellamy's pants ^^ (UK)
    Posts
    5,671

    Default

    Great job ff7+ff10 gurl 100! I know I'll be this techinque in the future

  7. #97
    Clone 01's Avatar
    Join Date
    Jan 2006
    Location
    Dublin,Ireland
    Posts
    332

    Default

    Quote Originally Posted by ZeZipster
    http://www.no-designs.net/forums/ind...?showtopic=258

    That's only if you're using Photoshop though.
    where do i go in here?

  8. #98
    dizzy up the girl Recognized Member Rye's Avatar
    Join Date
    Dec 2002
    Location
    a tiny boot
    Posts
    24,891
    Articles
    4
    Blog Entries
    3
    Contributions
    • Hosted Eyes on You
    • Former Cid's Knight

    Default

    I have a whole blinkie lesson from an old thread. I'll paste it there.

    ---

    I decided to make a tutorial because several people PMed me asking me to make blinkies for them, so I wanted to show everyone how. I've took screenies so you can see examples. I'll probably fix the size of the screenies later, for now, they're good enough.

    Required:

    -Animation Shop for animating (Sorry, but I dunno how Image Ready for Photoshop works all that much. However, if you know how to animate with it, and just have trouble DRAWING the blinkie, then no problem. From Step 7 on is Animation Shop required.) You can get Animation Shop from like, download.com, or at jasc.com at a 30 day trial. If you bought PSP7 from a store, you'd have gotten Animation Shop with it.

    -Patience

    Step 1) Start out in Animation Shop, Photoshop, or Paint Shop Pro. Create a new image that's 10 height by 100 length. The length could be increased, but that'd be a really long blinkie, so 100 is ideal.

    Step 2) Turn on the ruler option, if you have it. It makes things very neat and orderly. PSP7 and up will have this. Photoshop probably will too. Animation Shop does not, that's why I like to work with PSP7 and Animation Shop. View --> Ruler for the Ruler.

    Step 3) Fill in the box with a colour. Then at every 10th pixel, starting at zero, erase one pixel at the very top and bottom of the blinkie. Like in the screenie. I recommend you zoom in a lot for this.


    Step 4) You're definitely going to have to refer to the following screenie for this. Pick a shade a bit darker than the colour you've chosen for the blinkie, then, colour over in the following places on the screenie in the dark colour.


    Step 5) Pick a slightly lighter colour than the colour you chose for the blinkie (not the darker shade, the other shade) and colour in the following places:


    Step 6) Almost done drawing! Just gotta do the text. Now, I just draw the text using a one pixel brush tool. The letters take a bit of practice to make them look right. Keep in mind that they're pixels and upclose they make look odd, but look fine at normal size.


    Now, you can stop here and save it as a .gif with transparency, if you're fine with that, but if you wanna animate, copy your blinkie aaaand...

    Step 7) Paste it into Animation Shop. We're going to make a very simple blinkie so, it'll required few frames. Go to Edit --> Paste --> After current frames, so you get 3 of the same frames. Now, pick the colour you want one of your letters to be (I picked white) and using Flood Fill (the paint bucket shaped tool) click the first letter. It'll be white now. If you have pixels that are unconnected, like my R for Rye has, then, click the uncoloured pixel.

    Step 8) For the next frames, colour the next letter after, and so on until you have something like this:


    Step 9) You're basically done, but you may notice the speed of the flashing letters is too fast. If you want to fix this: Edit --> Select All. Then Animation --> Frame Properties. You'll see a number there. The number means frames per second. If you want to speed it up, put a smaller number. If you want to slow it down, put a higher number. Play around until it's nice. I recommend 15-20.

    You're done. Now just view animation and save it! You should get something like this:


    Some other blinkies I've done:


    Try different things and effects with the blinkies.


    Hope you enjoyed this tutorial and learned something. Post some of the blinkies you've made, also~

    ---

    That's a kind of old tutorial, but I don't feel like updating it at the moment. Enjoy~


  9. #99
    MacWerewolf Owen Macwere's Avatar
    Join Date
    Apr 2006
    Location
    With the angel that saved my world!
    Posts
    5,137

    Default

    Full sig tutorial
    I thought about making this tutorial as I started to get better at making these sigs, now this sig is so simple yet so good looking. I used to say WOW when I wasn’t that good with Photoshop ^^ but now, piece of cake ^_~. And here is the way:


    1. Make two new files: a. 500x200 pxl, set it transparent.
    b. 450x150 pxl, set it to white.
    2. with the second make the background, how? In mine I used some starry brush and brushed the white background with black and then dragged my desired picture. then filter>blur> Gaussian blur set it to 7, Now go layer>layer style>Blending options> set it to overlay.
    3. Duplicate the new layer by pressing Ctrl+J. for about three or four times and spread the duplicated layers around the canvas. Now you have the background.
    4. We start with the transparency. Select the whole canvas of the background by pressing Ctrl+A. now go, Edit>copy merged. Go to the other file the one 500x200 and go Edit>paste. Drag the layer wherever you like.
    5. now bring your picture and put it anywhere so that it looks good with the sig, I put it a side and thus erased part of the background so it would look better. Now bring your rectangular marquee tool and on the background layer draw a thin rectangular horizontally so that it would be wider than the layer. Go Edit> clear. And it is deleted. Now rotate the selected marquee by pressing right click on it> transfer selection and rotate it vertically take it to the side and Edit> clear again. Now done deselect the marquee.
    6.about the text, just type different sizes in different places and choose your font.
    7. go Layer> merge visible to make the whole layers one.(HINT: this makes the stroked edges smoother).
    8. Edit>stroke> set it black and 2 pixels.
    9.now done all we have to do is save it. File>save as> gif and type your name and that’s all.
    It is long I know, but I couldn’t think of another way to make it shorter, hope it helped ^^.

    Owen Macwere
    I <3 you Polaris
    ~Antratica forum~ You know you want to join =p

  10. #100
    Actual cannibal Pheesh's Avatar
    Join Date
    Apr 2004
    Location
    'Straya
    Posts
    8,371
    Articles
    4
    Blog Entries
    5

    Default

    my starry brush actually looks like a 5 pronged star and turns out nothing like that :s

    Stay Essential
    EE

  11. #101
    MacWerewolf Owen Macwere's Avatar
    Join Date
    Apr 2006
    Location
    With the angel that saved my world!
    Posts
    5,137

    Default

    well i don't really remember from where i got this brush, but I can send it to you via the e-mail i think.
    have you done Gaussian filter?
    EDIT: and well it is not necessary for your background to look exactly like mine, you can have your special one ^_~.
    Last edited by Owen Macwere; 07-05-2006 at 01:00 PM.
    I <3 you Polaris
    ~Antratica forum~ You know you want to join =p

  12. #102
    MacWerewolf Owen Macwere's Avatar
    Join Date
    Apr 2006
    Location
    With the angel that saved my world!
    Posts
    5,137

    Default

    first, sorry for double posting.
    Second, this is a tutorial for low quality pics
    ok, I just discovered this way to make low quality pics be of high quality, and I thought to share it with ya.

    1. I have this picture which is very low quality as you see:


    2. press ctrl+A to select the whol canvas.
    3. go: edit>copy. then Edit> paste.
    4. now go to: filter>blur> caussion blur> set it 2.8 or may be alittle higher or a little lower depends on how much your pic is of low quality. you should have something like this now:


    5.now go to: layer>layer style>blending mode> and set it to overlay. you must get this now:


    done. hope you enjoyed

    Owen Macwere
    I <3 you Polaris
    ~Antratica forum~ You know you want to join =p

  13. #103
    Actual cannibal Pheesh's Avatar
    Join Date
    Apr 2004
    Location
    'Straya
    Posts
    8,371
    Articles
    4
    Blog Entries
    5

    Default

    This is a guide to get you a transparent font that looks good and is still readable.

    1. Just get a font you like, and place it where you want on the sig. I suggest having the rest of the sig made before doing the font because I found that you can't move it after you've started. Make sure you get the size exactly how you want and put it were you want it to be on the finished product. I'd also suggest making the font colour something really visible.

    2. Put a stroke around it, mine was 2px and I found it works best with that particular font but muck around until it looks good.

    3. Get the magic eraser and set it to your font colour, then erase it, leaving the stroke over your background

    4. It's now just a matter of erasing the background until the stroke surrounds nothing but transparency. This will be annoying if your background is black or gray. You may have to test the sig on a colourful website a few times to make sure all font is transparent (I just previewed the sig on eoff and it sufficed).

    Here is a finished product incorperating the technique. But it doesn't look that good on the eoff skin i'm using.


    Enjoy.

    Stay Essential
    EE

  14. #104
    MacWerewolf Owen Macwere's Avatar
    Join Date
    Apr 2006
    Location
    With the angel that saved my world!
    Posts
    5,137

    Default

    Can someone please tell me, where I can find good C4d brushs and renders? really apreciated, thanks.
    I <3 you Polaris
    ~Antratica forum~ You know you want to join =p

  15. #105
    Clone 01's Avatar
    Join Date
    Jan 2006
    Location
    Dublin,Ireland
    Posts
    332

    Default

    does anyone know where i can find a grunge or abstract brush?

Posting Permissions

  • You may not post new threads
  • You may not post replies
  • You may not post attachments
  • You may not edit your posts
  •