| Chapter IX Summary |
| Take the Slab to Dr. Unne, in Melmond. With the Slab, Unne will be able to teach you the language of the Lefein. Go to Lefein, south of Gaia, and receive the Chime. Use the Chime to enter the Mirage Tower, and in the Mirage Tower, use the Cube you received in the Waterfall to enter the Sky Castle. Take the Adamant from the Sky Castle to Smith the Dwarven Blacksmith to receive the Xcalber sword, if you wish. On the top floor of the Sky Castle lives Tiamat, Fiend of Air, the last of the four Fiends in the game. Defeat Tiamat to relight the final Orb. |
| With your new Slab in hand, Dr. Unne in Melmond will now be able to teach you the language of the Lefein. Dr. Unne is in Melmond, if you'll remember, so pay him a visit. |
 |
 |
With the Slab, Dr. Unne is able to successfully teach you the language of the Lefein. So, go to Lefein and see what they have to say! |
| Once again, there is nowhere anywhere near Lefein to land your ship. This is the closest spot. It's a really long walk to get to Lefein, but ya gotta do what ya gotta do. Just go south, and you'll eventually come to Lefein. |
 |
 |
Here's the town. You might want to use a Tent or Cabin here because there is no Inn inside Lefein, and you might be a bit hurt from the monsters you fought while walking here. |
| If you happened to visit Lefein before you got the Slab, you noticed that the Lefeinish language consists of two words: Lu and pa. |
 |
 |
After you learn Lefeinish, however, the Lefein make a lot more sense. And the Lefein are chock-full of information. It looks like your Airship once belonged to the Sky Warriors, who were Lefeinish. |
| It was 400 years ago when the "destruction" occurred. At that time, the legend of the Light Warriors was born. |
 |
 |
The "destruction" was probably when the Lefeinish were kicked out of their castle by Tiamat, Fiend of Air. How horribly rude of him.
A Floating Castle certainly sounds interesting, though, doesn't it?
|
| Apparently, to get to the Floating Castle, you have to go to the Mirage Tower. Too bad you can't get into the Mirage Tower... yet. |
 |
 |
To enter the Mirage Tower, the Lefeinish used a musical chime; so the Mermaids said. Well, now you have a musical Chime, too! Now you can get into the Mirage Tower, and from there, the Sky Castle. But before you go, the Lefeinish have a lot more to say. |
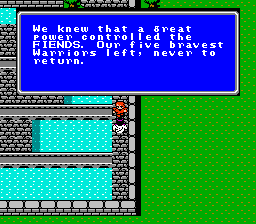
| It seems that there is some sort of "power" controlling the four Fiends. The Sky Warriors were sent to fight this "power", but they never returned. That's not good at all. |
 |
 |
The Sky Warriors, the greatest warriors of the advanced Lefeinish nation, went up against this power, and were turned into bats! This thing must be strong, if it can control the Fiends, and beat the Sky Warriors so badly. |
Well, this clears up another mystery. The Robot you found at the Waterfall was made by the Lefeinish, long long ago. Notice how this guy said robotS. There must be more robots in the Sky Castle.
Well, that's just about all the information the Lefein have to give you. But, before you go, there is one last thing to do in Lefein.
|
 |
 |
In the upper-right corner of Lefein, you'll notice a hole in the wall. Walk through that hole, and go straight to the right. |
It's a hidden Magic Shop! In this Magic Shop are the last two Level 8 spells, the ones that aren't for sale in Gaia. They are arguably the best spells in the game, too: NUKE, a super-powerful FIRE spell; and LIF2, which resurrects a character with FULL HP! These things are expensive, though. I hope you brought 120,000G with you, or you're going to be coming back here later.
Well, that's all there is to do in Lefein. Make the loooooooong walk back to your Airship.
|
 |
 |
You now have everything you need to enter the Mirage Tower, and the Sky Castle. But, of course, before doing so, stop by Gaia, and pick up all the spells and equipment you will need for the dungeon. Go to another town where Heal Potions are at the top of the items list, and stock up on them, too. When you're ready, it's time to tackle the last Fiend, and light the last Orb. |
| III. The Mirage Tower |
Mirage Tower treasure:
L1: Cabin, Aegis Shield, 2750G, 3400G, 880G, 18010G, Vorpal, Heal Helmet
L2: 13000G, 12350G, Thor's Hammer, 7900G, 8135G, House, 7690G, Sun Sword, 10000G, Dragon Armor
L3: None
|
| The Mirage Tower is in the middle of a huge desert. There are a couple places to land your Airship, but the closest is this tiny piece of grass near the mountains. Land there, and walk to the northwest to the Mirage Tower. |
 |
 |
If you didn't have the Chime, you could not enter the Tower. But now that you do have it, you don't have to do anything special with it (you don't have to use it from the Item menu or anything). Just having it is enough. Save outside, and enter the tower. |
This being the second to the last dungeon in Final Fantasy, there are some awesome weapons and armor in the Mirage Tower and Sky Castle. The Ninja's and White Wizard's best weapon, the Fighter's best armor, another Ribbon, and a whole lot more are waiting for you here. There is also so much G (and weapons and armor that can be sold) that you will never need to hunt for G ever again, after you're done with this dungeon.
There are also some nasty enemies roaming this place, unfortunately. In fact, the hardest enemy in the game is in the Sky Castle, but more about that later. The rest of the enemies are no pushover, either. But at this point in the game, if your levels are around 22 or so, you should not really have any problems.
|
 |
 |
The first floor of the Tower has a crapload of great treasure. The Aegis Shield is worth keeping. The Heal Helmet is also worth keeping; it works the same way as the Heal Staff, so now you can have TWO characters healing your entire party for free in every battle. You can just sell the Vorpal; it's not that great. |
| The maze-like path to get all the treasure isn't that hard to figure out. All of the treasure chests can be reached, one way or another; you'll figure it out, I'm sure. The stairs to the next level are right near the exit, at the bottom. |
 |
 |
On the next floor, you have to take a long, winding path to get to the stairs (and the treasure). Go up and to the right. |
| When you get to this point, take the inside path. |
 |
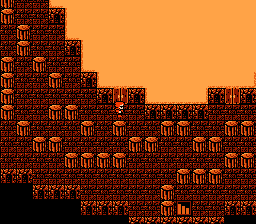 |
Eventually you'll end up on the left side of this floor. Now you can access the inner room. Head down and to the right to find the door into that big room. |
| There is a whole lot of good treasure in here. Namely, the Sun Sword, which is an even better weapon than the Defense; Thor's Hammer, which is not only the White Wizard's best weapon, but also casts LIT2 as an ITEM in battle; and the Dragon Armor, which is tied with the Opal Armor for the best armor in the game. There is also upwards of 55,000 G here. |
 |
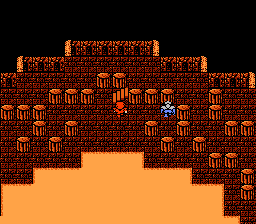 |
When you're done rolling around in all the G you just found, go back up to the top of this floor to find the stairs to the next level. |
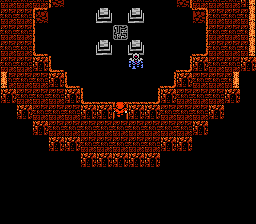
| This floor has no treasure at all. There is just one room, the entrance is at the bottom. Right inside that room is the next mini-boss: the Blue D. |
 |
 |
The Blue D is pretty darn easy to kill, if your characters are at high levels like they should be. Use FIR3 to whoop him. (check out my bosses page if you really need to.) |
| IV. The Sky Castle |
Sky Castle treasure:
L1: 9900G, Heal Potion, 4150G, 7900G, 5000G, ProRing, 6720G, Heal Helmet, 180G, Bane Sword
L2: Silver Helmet, House, Opal Gauntlet, 880G, 13000G, Ribbon, Opal Shield, Adamant, White Shirt, Black Shirt
L3: 9000G, Heal Potion, ProRing, 5450G, Soft Potion, 4150G, 3400G, Katana, 6400G, Cloth, ProCape, Soft Potion, 9500G, 8135G
L4: None
L5: None
|
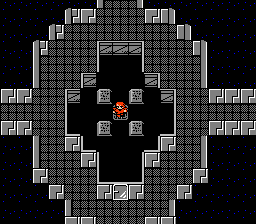
| The Sky Castle has some harder enemies in it than the Mirage Tower. But they're not all that much harder. Except for Warmech, but we'll get to that later. (he he he...) For now, you'll notice that you've appeared in the middle of a four-way intersection. Go left first.) |
 |
 |
There is a couple thousand G here, and a Heal Potion. Oh boy. Go back to the intersection, then go down. |
| In this room you'll find a really nice piece of treasure: the Bane Sword. It casts BANE when used in battle! This is insanely useful. Now you can wipe out large amounts of enemies instantly, without wasting spells. (even though BANE doesn't work all the time, it still works quite often, against many monsters). Go back to the intersection, and go right. |
 |
 |
Over here, you'll find yet another Heal Helmet. You might notice that you're running out of room for all this treasure. It's up to you really which items you want to keep. Personally, I usually only keep one Heal Helmet and ditch the other one. It isn't necessary to have three characters with a Heal item; two is more than enough. But it's up to you. Go back, and take the top route. |
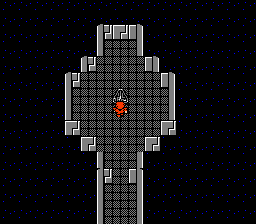
| This is the teleporter to the next level. Use it. |
 |
 |
You have now appeared at the top of another big intersection of rooms. This time there are eight branches. I'll start with the upper-left room, and go counterclockwise from there. |
| The upper-left room has a Silver Helmet (worthless; just drop it), and a House. Oh boy. |
 |
 |
The room on the left has a bunch of G. Don't worry, it gets better. |
| The bottom left room has something very special: Adamant. If you recall, waaaaaaaaay back in the Dwarf Cave, the Smith said he'd make you a special sword if you ever found Adamant. Well, you found some! But before rushing back to the Cave, just get the rest of the stuff on this floor first. |
 |
 |
Skip the bottom room; that's just the stairs to the next level. The bottom right room has two excellent pieces of armor: the White and Black Shirts. They aren't really worth equipping, but the Black Shirt casts ICE2 in battle, and the White Shirt casts INV2. Both are worth keeping, if you have room in your armor inventory for them. |
| In the room on the right, you'll find the third and final Ribbon. With three Ribbons, and four characters, one is just going to have to do without. Sad, isn't it. |
 |
 |
The final room has another Opal Gauntlet, which isn't worth keeping.
Now that you're done with this floor, if you have a Knight in your party, you should consider leaving the Castle right now to go visit the Dwarf Cave, to get the BEST sword for the Knight in the whole game (except the Masmune, of course). Cast EXIT to leave quickly, or cast WARP 5 times if you don't have EXIT, or walk if you don't have either. Then board your Airship, and head back to the Dwarf Cave.
|
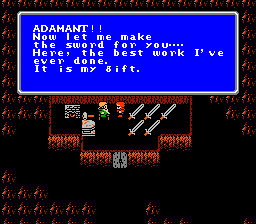
At the Dwarf Cave, talk to Smith. He forges you the ultimate sword, XCalber, and he gives it to you for free! Being a Light Warrior sure does have its advantages.
No doubt, you have a lot of weapons that need selling. Now is a good time to do so. If your Wizards are at level 23 or above, they will be able to use Level 8 spells, so now is also a good time to buy all the spells you couldn't afford before. I had 240,000 G at this point in the game, more than enough to get Level 8 spells for everyone. Make sure you get NUKE, ZAP!, LIF2, and WALL, especially. All of these spells are more than worth the 60,000 G they cost. Once you're done with all that, go back to the Mirage Tower, and make your way back to the second floor of the Sky Castle.
|
 |
 |
It shouldn't take you too long to get back up to this floor, especially now that you have XCalber. The stairs to the third floor are at the bottom. |
| The third floor has some more nice treasure, as well as some other things. Head to the right, first. |
 |
 |
All the way to the right, you'll find another room full of treasure. The Procape is a piece of armor usable by your White and Black Wizards; it's definitely worth having, because your mages can use all the protection they can find. You'll also find some Cloth (I assume that's the programmers' idea of a joke. Ha ha ha.) And some other stuff. Lots of G, especially. After you're done, head back to the intersection. |
| You probably noticed that Robot standing there. Talk to him, and he tells you to look out the window. Might as well... |
 |
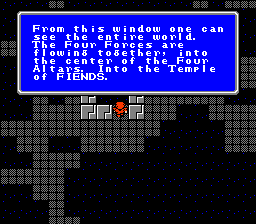 |
When you do look out the window, there is a strange, cryptic mention of the Temple of Fiends. Four forces are flowing into it. It also says that the Temple is the center of the four Altars. That means the Fiends' elemental altars. If you look at the World Map, you'll notice that amazingly, this is true; draw a line from Onrac to Gurgu, and from the Mirage Tower to the Earth Cave, and they'll cross at the Temple of Fiends! How amazing! This is, of course, a huge part of the plot, which you'll see pretty soon. For now, take the path up, to find some more treasure. |
| You'll find some minor treasure in the room at the top. After you're done there, go all the way to the bottom if you'd like, although all you'll find is a bunch of computers that say the same thing. No treasure. Go back to the intersection, and to the left, to find the last treasure room. |
 |
 |
In this room, you'll find, amongst other things, the best sword for the Ninja, the Katana. There is also some other minor stuff, if you want it. The stairs are right there below the room. |
| This floor is supposed to be some sort of tricky room. If you walk straight in any direction, you'll just keep going in circles forever. All you have to do to find your way to the next floor is walk two "blocks" down, and two to the right. Or two up, then two left. It's not that hard to figure out. You can tell the teleporter to the next level because it'll be a triangle pointing up; the teleporter you just used is a triangle pointing down. |
 |
 |
See? Not hard at all. If by some chance you get lost, just cast WARP to go back a level, then try again. |
| This is the final floor in the Sky Castle. It's also the most dangerous. It's nothing but a super-long bridge, but on that bridge lurks the awesome Warmech. |
 |
 |
The chances of finding Warmech (or maybe I should say, the chances of Warmech finding YOU) aren't good. He's rather rare. But not as rare as you would like, I'm sure. Warmech is a walking death machine. I wandered here for a couple minutes to find him for this walkthrough, and he beat the crap out of my level 26 characters like they were toddlers. See that screenshot? My Knight had 550 HP before this battle, and Warmech hit him for 281 damage before I even got a chance to do anything (if he hits a Knight with Dragon Armor for 281 dmg., imagine what he does to Wizards. *shudder*) The next round, he NUCLEARed my Knight to death, and all my other characters were on death's door. The next round, ALL of my characters were dead. |
Warmech can hit for way over 400 damage with a physical attack, and he has a NUCLEAR spell that hits each character for 200+ damage. Plus, he very often gets to attack first, so you might be dead before you even get a chance to run.
My point: pray that Warmech doesn't find you. If he does, at this point in the game, you're probably going to die a horrible, flaming death. Just be happy you were killed by the best. (if you're insane enough to try to fight Warmech, check out my bosses page)
|
 |
 |
If you make it to the Fiend's room at the top, make sure you are healed up before inspecting the Orb, of course. |
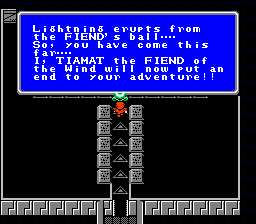
| Tiamat apparently hasn't learned from watching you whoop the crap out of the other three Fiends. He thinks he can take you. *sigh* I think you know better. Time to light the last Orb. |
 |
 |
Tiamat is not very hard at all. Kill him the old fashioned way, if you like. Or, you can use BANE (or the Bane Sword) for a one-hit kill. It's amazing that the programmers would let you kill the last Fiend in such a cheap way, but it works. (my bosses page has more info on Tiamat, of course). |
| Now that Tiamat is dead, walk forward, and light the last Orb! Now all the Orbs are lit! The game is over, time to roll the credits, right? ...wrong |
 |
 |
The game is NOT over yet. Remember that weird thing with the Temple of Fiends? Yup, you gotta go check it out. You've killed the Four Fiends, but you still don't know where they came from. The Circle of Sages is sure to have information about this; next stop, Crescent Lake. |
| Optimal equipment by the end of Chapter IX |
 Xcalber, Dragon Armor, Opal Helmet, Aegis Shield, Proring
|
 Ice Katana, Ice Armor, Ribbon, Ice Shield, Proring
|
 Catclaw, Gold Bracelet, Ribbon, Proring
|
 Thor's Hammer, Opal Bracelet, Ribbon, Proring
|
| 56 |
| 8-16 sn |
| 117 |
| 117 |
| FIRE, HARM |
| N/A |
| QAKE, ICE, RUB, BANE, STUN, SLEP, DARK |
| 200 |
| -50 SN |
| 1224 |
| 40 |
| N/A |
| N/A |
| RUB, BANE, STUN, BRAK, SLEP, DARK |
| 80 |
| 30-60 |
| 300 |
| 300 |
| FIRE, HARM |
| N/A |
| QAKE, LIT, ICE, RUB, BANE, BRAK, STUN, SLEP, DARK |
| 200 |
| 30-60 |
| 1272 |
| 700 |
| ICE |
| SNORTING |
| QAKE, FIRE, RUB, BANE, STUN, SLEP, DARK |
| 156 |
| 76-152 |
| 1200 |
| 2000 |
| FIRE, HARM |
| DAZZLE |
| QAKE, ICE, RUB, BANE, BRAK, STUN, SLEP, DARK |
| 80 |
| 30-60 |
| 276 |
| 300 |
| LIT |
| N/A |
| ICE, FIRE, BANE, BRAK, STUN, SLEP, DARK |
| 358 |
| 53-106 |
| 1614 |
| 807 |
| N/A |
| N/A |
| QAKE, RUB, BANE, BRAK, STUN, SLEP, DARK |
| 190 |
| 44-88 |
| 2700 |
| 3000 |
| N/A |
| XFER, NUKE, XXXX, BLND |
| RUB, BANE, BRAK, STUN, SLEP, DARK |
| 162 |
| 30-60 |
| 3225 |
| 3250 |
| N/A |
| XXXX, BRAK, RUB, LIT2, HOLD, MUTE, SLOW, SLEP, GLANCE, SQUINT, GAZE, STARE |
| Qake |
| 200 |
| 40-80 |
| 3420 |
| 3420 |
| N/A |
| WALL, XFER, HEL3, FOG2, INV2, CUR4, HEL2, CUR3 |
| N/A |
| 420 |
| 7-14 PO |
| 3489 |
| 4000 |
| N/A |
| RUSE, MUTE, SLOW, DARK, SLEP, FIRE, LIT, HEAL |
| N/A |
| 200 |
| -50 SN |
| 1224 |
| 40 |
| N/A |
| N/A |
| RUB, BANE, STUN, BRAK, SLEP, DARK |
| 350 |
| 40-80 |
| 4584 |
| 5000 |
| N/A |
| FIR2, SLOW, DARK, SLEP, FIRE, LIT, CURE |
| FIRE, ICE, LIT, QAKE, BANE, STUN, SLEP, DARK, |
| 176 |
| 64-128 po |
| 1257 |
| 800 |
| N/A |
| FAST |
| LIT, ICE, FIRE, RUB, BANE, BRAK, STUN, SLEP, DARK |
| 200 |
| 30-60 |
| 1272 |
| 700 |
| ICE |
| SNORTING |
| QAKE, FIRE, RUB, BANE, STUN, SLEP, DARK |
| 200 |
| 20-40 |
| 2385 |
| 000 |
| N/A |
| SLOW |
| QAKE, ICE, LIT, FIRE, RUB, BANE, BRAK,STUN, SLEP, DARK |
| 400 |
| 102-204 |
| 4000 |
| 2000 |
| LIT |
| N/A |
| QAKE, ICE, FIRE, RUB, BANE, BRAK, STUN, SLEP, DARK |
| 156 |
| 49-98 PO |
| 1101 |
| 900 |
| FIRE |
| N/A |
| QAKE, LIT, ICE, RUB, BANE, BRAK, STUN, SLEP, DARK |
| 1000 |
| 128-256 |
| 32000 |
| 32000 |
| N/A |
| NUCLEAR |
| FIRE, LIT, ICE, QAKE, BANE, BRAK, STUN, SLEP, DARK |
| 300 |
| 90-180 SN |
| 2385 |
| 3000 |
| FIRE, HARM |
| AFIR, MUTE, ICE2, LIT2, FIR2 |
| QAKE, ICE, RUB, BANE, BRAK, STUN, SLEP, DARK |


 Games
Games